Showing posts with label acrylic paint. Show all posts

Thursday, March 13, 2014

Louise Nevelson Inspired Fish Assemblage Project

We started a project a couple of weeks ago based on Louise Nevelson's monochromatic assemblages.  Mrs. Luker happened to have a bunch of donated soy milk cartons, which we thought would make a great base for the fish assemblages.  I contacted the owner of 'Ol 42 Grub House to see if it would be possible to exhibit the fish there, and they gave us the green light.

First we took a look at Nevelson's work...


We discussed how these assemblages are made up of many different objects and painted one color, which solidifies all the objects as one cohesive piece and in turn, creating something new.   Because we are creating fish, we thought it would be a good idea to also look at Sandy Skoglund's piece, Revenge of the Goldfish....


We talked about how the fish are all the same color, the background is also one color.  Like Nevelson, Skoglund uses a monochromatic/limited palette.  

We began brainstorming ideas for our carton fish and using cardboard, straws, bottle caps, as well old donated and discarded items to suggest fish parts.  Soon eyes, fins, and tails began to emerge....


The following week, we began painting.  After a short discussion, we decided to divide the kids in half.... some would paint their fish all white, some all black, with 3 students chosen at random painting orange fish as accents.  


I can't wait to see these fish finished and hanging at 'Ol 42 Grub House!  They are really coming along.  
We are also starting our 2 panel fruit and vegetable mosaics, which will be hung in the school cafeteria.   This is a big project and will involve the entire 4th grade class as well as art enrichment students.  See you next week! 

Saturday, May 25, 2013

Creepy Crawly Critters

Mrs. Luker and I were very pleased with the results of the Creepy Crawly Critter Sculptures.  Each student took their insect concept and brought it to life in three dimensions.  We used recyclable materials such as paper towels and scrap paper wrapped around a wire armature or base.  We then began wrapping the base sculpture in plaster.


We also added other elements such as pipe cleaners for legs.  Once the plaster was dry the following week, we began painting them with vibrant acrylic paints.  


As often happens in artmaking, sometimes the creative process can take a turn or two.  Originally Mrs. Luker and I thought we might make a book out of the resulting sculptures.  The idea was to include all of the insects in a story that built upon one another sort of like the The Napping House by Audrey Wood.  We had a lot of characters for our story, which made creating the storyline a bit of a challenge.    So, we went with another idea.  With spring approaching, we thought it might be interesting to see what these insect sculptures would look like in the natural world.  We picked a nice afternoon to photograph our sculptures outside.  Each student chose a place and setting for his/her insect.  Here is a slideshow of the photographs from that day...


Wednesday, December 12, 2012

A New Year!

I'm a bit behind on posting for this year's art enrichment classes.  We began in early November and we've made a few changes this year.  In order to accomodate more students, we have split Art Enrichment up into two groups.  The first group will meet from November through January and the second group will meet from February through April.  Mrs. Luker and I are thrilled that there is such an interest in Art Enrichment, now that we are entering our fourth year of this after school program.  Breaking the students into two groups has allowed us to serve 46 students over the course of five months.

For our first class, we completed a getting to know you exercise.  I had students fill out a questionnaire that included questions such as, "What is your favorite artist?"  The students mentioned Vincent Van Gogh more than any other artist.

Our first project, is an altered puzzle which will hang in the art room at Plain City Elementary.

A student creating three-dimensional cut paper butterflies

Paint, paper, and other found objects working together.

Working through composition ideas and color choices.

Just like a regular puzzle, no two pieces are alike. 


We talked about artists who alter books and other media to create works of art.  Many of these artists take an unwanted or discarded book and creatively "upcycle" using paint and collage.  Each art enrichment student is creating a work of art using a giant puzzle piece, which will fit together to form a collaborative work.  I plan to photograph the finished puzzle and hope to have a printed copy for each student to hang at home.  More on that soon!

Tuesday, February 28, 2012

Sculptures...They Are Time Consuming!

I can't believe it, but it's been a month since I last posted here!  Long story short, we've been working on our found object sculptures which turned out to be a much more time consuming project than we anticipated.  After we built the wire armature, we covered our sculptures with foil to give them form.


Some students were ready to start painting their sculptures with acrylic black or bronze paint.

We used paint as a way to cover the foil with a solid color and also give our sculptures a way to bond the glue to the found objects we are gluing on.


Once the paint was dry, it was time to start adding objects:


So.... the kids are gluing objects on their sculptures... what are they learning? And what does it mean?

 Well, for one thing we've been talking about the human impact on our earth and how much "stuff" we all have and how much we throw away.  We've been discussed some artists who deal with what is called "post consumer art".   These artists don't just throw a bunch of junk together and call it art.  There is intent behind the objects they've chosen.  Each of these objects has a color, form, shape, and/or representation from its context.  All of these things bring meaning and aesthetics to these sculptures.  

We've told students not to buy anything for their sculptures. These objects are things that would be thrown out or are extra things you've had lying around the house.  We are going to work on these projects for one more week, and then move on to something different:  a digital graphic design poster project.


Friday, March 4, 2011

Week 13- Catching Up and Starting to Brainstorm

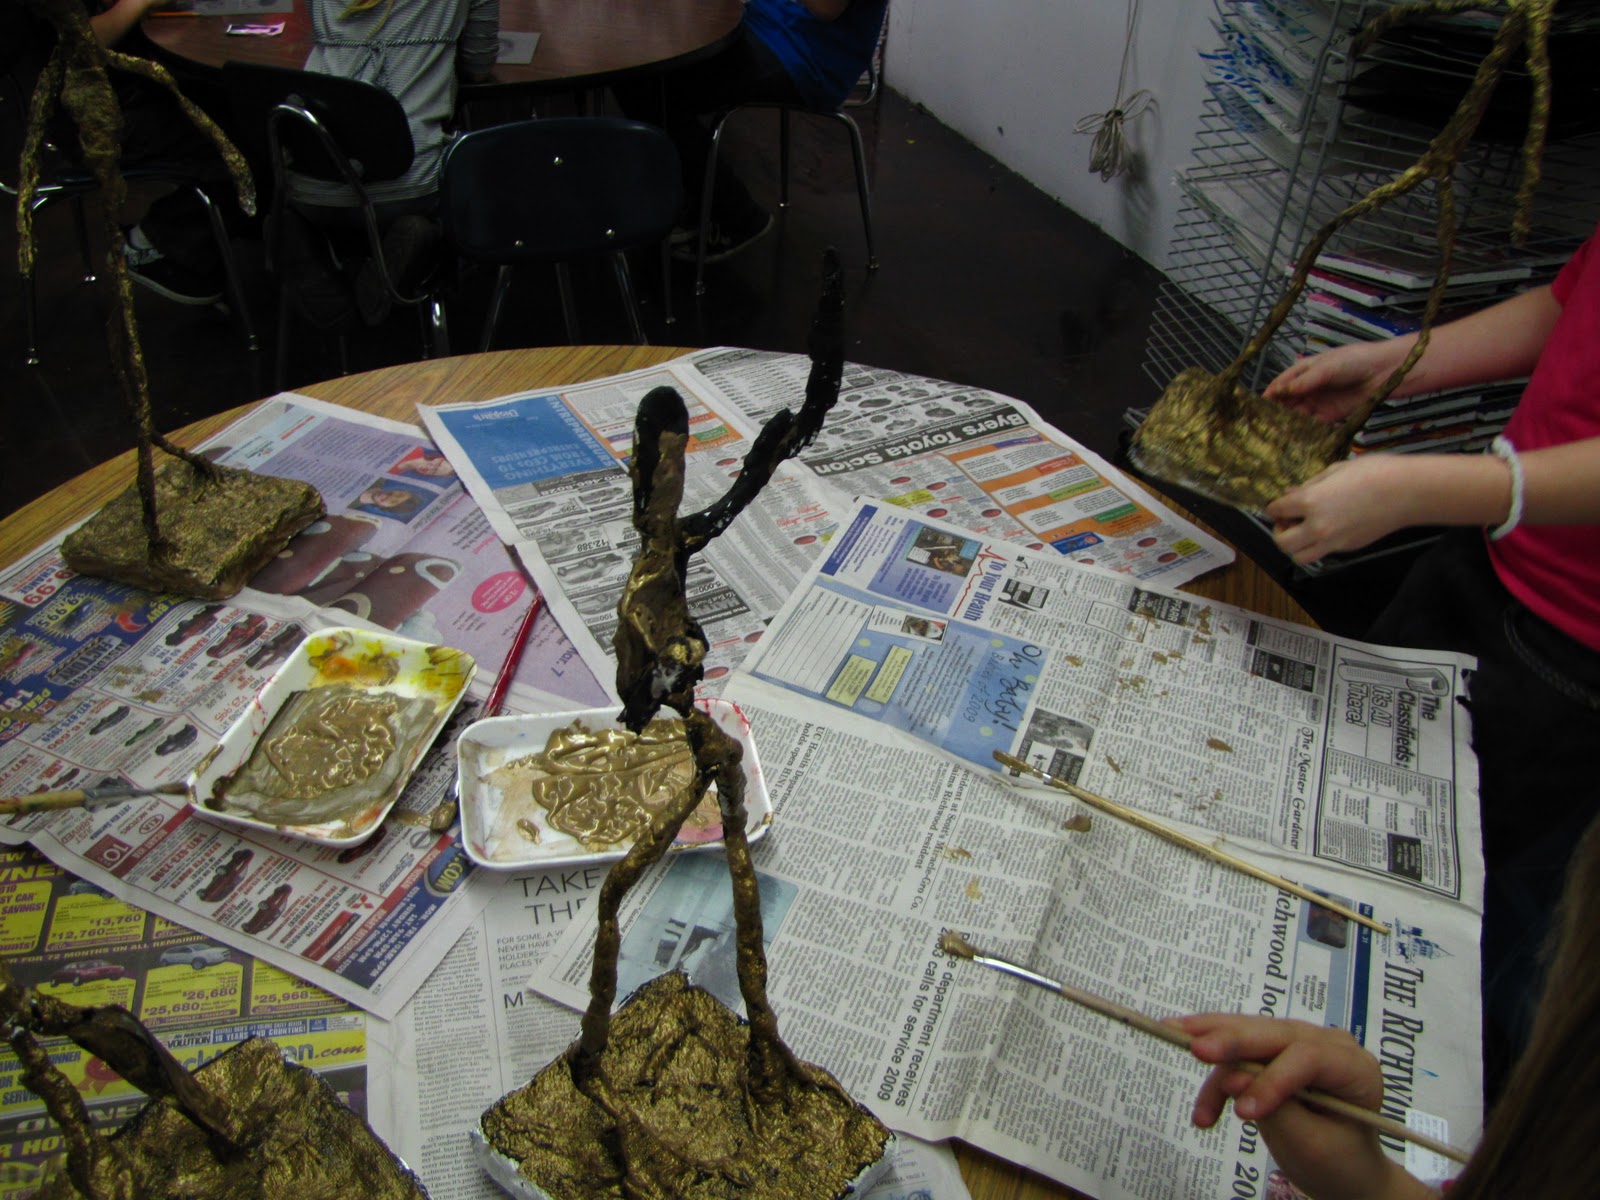
As often happens this time of year, some students have missed a class or two so this week we had those students finish up their Giacometti sculptures.  Those who were done, did some more work on their charcoal portraits and began to brainstorm for our next project.  So, basically we had 3 or 4 different things going on at once today in art enrichment class.  Some kids were just painting the black layer on their sculptures, some were finishing up the gold/bronze layer of paint, and others were adding shading and highlights to their charcoal portraits.


Mrs. Luker and I didn't want to reveal too much about this next project, but we did tell the students that it will be a video to be shown during the Spring Arts Show.  We asked students to come up with their favorite memories of Plain City Elementary and write them down on a large piece of paper taped to the chalkboard.  


Next week we'll talk  more about the direction and content of the video and do some more brainstorming.  See you next Wednesday!!

Week 12- Gold and Bronze Figures

This week, we completed the final step in our Giacometti inspired sculptures.  We dabbed a thin layer of either bronze or gold acrylic paint on top of the black layer.  The result, is something that looks like brushed metal.  Mrs. Luker and I have already heard many compliments on how great these sculptures look.  Just wait until we have them on display in the glass cases in the front of the school, where everyone can see them!


Week 11 Painting the Black Layer

This week, we painted the black layer of our figure sculptures.  This is the first step in making our sculptures look like bronze or gold.  Some students thought they really looked like the long skinny shadows we looked at during the PowerPoint presentation.


The next step is painting bronze or gold to really make the sculptures look like solid metal.  See you then!

Wednesday, June 9, 2010

Week 20- Finishing our Abstract Canvas Project

This week, we finished our abstract paintings.  Last week, we cut out shapes from the center of the contact paper that resulted in various windows in which we painted a complementary color of paint.  This week, we did the opposite.  We cut shapes out of contact paper, and pasted those on the canvas.  We painted over the shapes.  The shapes are covering the previous work we did.  A complementary color will surround these shapes. The acrylic paint we use is student grade, so it's a bit sheer.  We can still see some of the previous work through the complementary color resulting in a very interesting abstract painting exploring shape and color.


Monday, May 17, 2010

Week 19- Continuing our Abstract Canvas Project


This week, we added a layer of acrylic on top of the blended colors we put down on the canvas last week.  The kids cut out linear and geometric shapes in contact paper.


We talked about abstract shapes and artists and I showed some examples from Jean Miro, Paul Klee and also some Aboriginal art, since they are also studying that in their regular 4th grade art classes.


The students drew shapes on contact paper with sharpie marker and then cut those shapes out from the inside.  From there, they peeled the contact paper backing off with the help of myself or Ms. Elizondo and then carefully placed the contact paper on the canvas.


Then, the students picked a complementary color to paint in the windows they created in contact paper on to the canvas.  The result is a wonderful  blend of shape, color, and interesting composition.

Next week, well do the opposite.  We'll cut out shapes in contact paper, place those on the canvas and then paint over the negative shapes.  Instead of painting in the "windows" or in the shapes we've cut out, we'll be painting around them.  Sound confusing?  Well, you'll have to see how they all turn out as we unveil them at the Art Enrichment Class end of the year party on Ma 25th.  :)

By then, we'll know the winners of the Plain City Postcard Contest.  Speaking of which, one of our students, Rachel had her painting printed in the Plain City Advocate this week.  


The winners will be announced this weekend, at Plain City Heritage Days, 1pm at the Flatiron.
According to Mainstreet Treasures, here were 59 adult entries and 11 youth entries.  Fingers crossed that some of the youth winners are students from PCES!

Tuesday, May 11, 2010

Week 18- Starting our Abstract Canvas Project

This week, we started an abstract acrylic on canvas project.  The students chose two colors to blend as their background...


We talked about blending the two colors, so that you could see both the orginal colors, plus the blended color.  For example, students who chose red and blue would have red, blue, and some shades of purple on their canvas.  


We painted our entire canvas area... even the sides of the canvas, creating a natural frame.  There were some really beautiful color combinations.  The kids paired up in groups if they were using the same two colors.  But, no two canvases look alike!


This week, we'll work on our next layer utilizing Contact Paper cut in to abstract shapes.  See you then!

Thursday, March 25, 2010

Weeks 13 & 14- Painting our Animal Sculptures

Sorry I haven't put up a blog post lately.  During the past 2 classes, we painted our animal sculptures.  


Mrs. Luker told me that she's gotten lots of compliments on the kids' sculptures.  I'm not surprised... they look amazing!  Look for these sculptures after spring break in the glass display cases at the front of the school.  


Speaking of Mrs. Luker, this is the last class that these fourth graders will have with her, as she will be off for maternity leave after spring break.  Mrs. Luker... thank you so much for your time and talent in art enrichment class!  We wish you all the best for the upcoming birth of your child!  :)

After spring break, we will start a couple of painting projects.  One involves painting with acrylics on canvas and layering shapes with contact paper.  The other, is a postcard contest sponsored by the Plain City Business Association.  Details to follow soon!